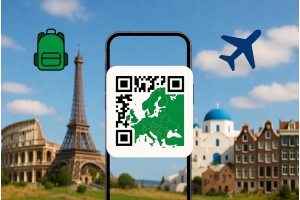
Traveling to Japan in 2025 and want seamless internet access without dealing with physical SIM cards? eSIM technology has made it easier than ever to stay connected. Whether you’re landing in Tokyo, exploring Kyoto’s temples, or heading to Osaka’s vibrant food scene, activating a Japan eSIM before your trip ensures you’re online instantly upon landing. One of the most traveler-friendly options is RORO eSIM, known for easy setup and reliable coverage across Japan’s major cities. Here’s how to activate your eSIM on both the iPhone 17 and Samsung S24 step-by-step.
Step 1: Prepare Before You Travel
1. Check Device Compatibility
Make sure your device supports eSIM:
For Apple: the iPhone 17 series supports eSIM natively.
For Android: Samsung S24 series (S24, S24+, S24 Ultra) supports eSIM if your specific model is unlocked and supports the feature.
Make sure your phone is unlocked so it can accept international eSIM profiles.
2. Buy Your Japan eSIM Plan on RORO
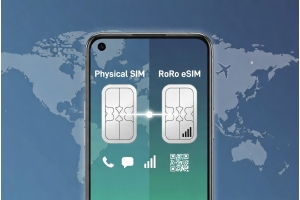
Visit the RORO eSIM website and choose a Japan data plan that matches your travel length and usage needs — fixed-data options like 5 GB and 10 GB, or unlimited-style options with daily high-speed quotas. You’ll receive a QR code or activation info after your purchase.
Pro tip: Save the QR code and activation details to your email or screenshot them before you travel — this ensures you won’t need Wi-Fi when you land.
Step 2: Install the eSIM on Your Phone
On iPhone 17 (iOS 17+)
Open Settings → Mobile Data (or Cellular).
Tap Add Data Plan (or Add eSIM).
Scan the QR code provided by RORO using the camera. The phone will detect and prompt installation.
If the scan doesn’t work, choose Enter Details Manually and type in the SM-DP+ address and activation code found in the RORO email.
After installation, rename the eSIM line (e.g., “RORO Japan”) so you can easily manage it alongside your main SIM.
Note: Don’t turn this eSIM on until you land in Japan. If you activate it too early, you may start your validity period prematurely.
On Samsung S24 (Android)
Open Settings → Connections → SIM Manager (or similar menu depending on UI).
Tap Add eSIM.
Choose Scan QR Code and scan the code from RORO.
If needed, use Manual Entry to input the activation code from RORO.
Rename the eSIM profile to “RORO Japan” for clarity.
After installation, keep the eSIM off until you reach Japan — this prevents your plan from activating early.
Step 3: Activate Your Japan eSIM on Arrival
Once you land in Japan:
Go to Settings → Mobile Data (iPhone) or Connections → SIM Manager (Samsung).
Enable the RORO eSIM line.
Turn on Data Roaming for the eSIM — this allows it to connect with local Japanese carriers.
Select the eSIM as your mobile data line if needed, especially when keeping your home SIM active for calls/SMS.
Within moments your phone should connect to local networks (like KDDI or others supported by RORO), giving you internet access immediately. Try opening a map or browsing a web page to confirm connectivity.
Troubleshooting Tips:
If you don’t get a signal, toggle Airplane Mode ON → OFF or restart your phone.
Ensure your default data line is set to the RORO eSIM if you have dual SIMs.
Monitor your usage via phone settings or RORO’s dashboard to avoid surprises on limited plans.
Useful Tips for Both Devices
Install before travel: Set up your eSIM while on Wi-Fi at home. This makes your arrival smoother and ensures you don’t waste any data validity.
Keep your physical SIM active: If you still want to receive messages or calls from your home number, continue using your primary SIM while using the eSIM for data only.
Hotspot sharing: Some RORO plans support tethering, but check your specific plan’s allowances.
Why RORO eSIM Is a Great Choice for Japan
RORO eSIM is specifically designed with international travelers in mind. You can purchase plans that cover Japan data ahead of time, install instantly using a QR code, and avoid airport SIM queues or roaming charges. With coverage on major Japanese networks and simple activation steps, RORO makes connectivity straightforward for your trip.