In 2025, dual SIM phones — whether iPhones or Android devices — make managing mobile connectivity easier than ever, especially for travelers. With a dual SIM setup, you can keep your home number active on one line and use a travel eSIM on the other for data abroad. One of the most convenient ways to stay connected internationally is through RORO eSIM, a digital SIM solution that lets you install and activate data plans without needing a physical SIM card. In this guide, we’ll walk you through how to activate an eSIM on dual SIM phones step-by-step, ensuring seamless connectivity for your trip or daily life.
What You Need Before Activation
Before you begin, make sure you have the following:
A compatible dual SIM phone — most recent iPhone models and many Android devices (Samsung Galaxy, Google Pixel, etc.) support eSIM alongside a physical SIM.
Your eSIM QR code or activation details — purchased from a provider like RORO eSIM. You’ll typically receive this immediately via email after purchase.
Wi-Fi connection — required to download and install the eSIM profile.
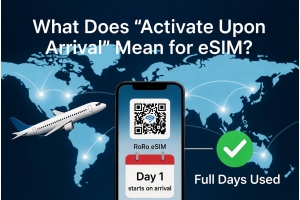
It’s recommended to install the eSIM before you travel, so you’re connected as soon as your device lands in a new destination.
Step-by-Step: Activate eSIM on Dual SIM Phones
1. Buy Your eSIM Plan
Start by selecting a plan that matches your travel location and data needs. On the RORO eSIM website, you can choose data plans for specific countries (e.g., Thailand, Spain, USA) or broader regional/global coverage. Once you complete your purchase, you’ll receive the QR code and installation instructions instantly.
2. Install the eSIM
On iPhone (iOS)
Open Settings → Cellular (or Mobile Data).
Tap Add Cellular Plan (Add eSIM).
Scan the QR code provided by RORO using your camera.
Follow on-screen instructions to complete installation.
Rename the new line (e.g., RORO eSIM) for easy management.
You may also enter the activation info manually if the QR scan doesn’t work: choose “Enter Details Manually” and type in the SM-DP+ address and activation code provided by RORO.
On Android (Samsung, Pixel, etc.)
Go to Settings → Network & Internet → SIMs → Add eSIM.
Tap Scan QR Code and scan the RORO QR code.
Complete the install by following the prompts and naming the plan.
If needed, choose “Add Manually” and enter the activation details from your RORO email.
Choose Your Default Lines
Once the eSIM is installed, you’ll likely have two active SIM profiles:
Your home SIM (physical SIM) — for messages and calls back home
Your RORO eSIM (digital SIM) — typically used for data while traveling
On both iPhone and Android, you can go to SIM settings to choose which line handles:
Mobile Data
Voice calls and SMS
iMessage/FaceTime (iPhone)
For travel, most people set the RORO eSIM as the default data line and keep their home SIM for calls/SMS if needed.
Enable Data Roaming (If Needed)
After installation, make sure Data Roaming is enabled for your RORO eSIM profile. This allows your phone to connect to local networks abroad. If your primary SIM still has roaming enabled, you may inadvertently use it instead of your eSIM — which can lead to roaming charges. Turn off roaming for your home SIM and keep it enabled only for your RORO eSIM.
Monitor and Manage Your Data
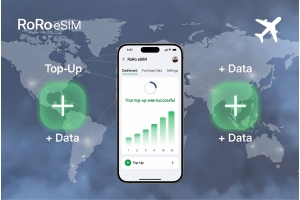
Once the eSIM is active, you can monitor data usage in your phone’s settings. Both iPhone and Android allow you to see how much data you’ve used on each line, so you can avoid running out prematurely. RORO also provides plan info and top-up options through your account or the dashboard, so you can add more data without reinstalling anything.
Tips for a Smooth Activation
Install before arrival: Always install your eSIM before traveling — this avoids connectivity delays or blocked provider sites in certain countries.
Keep your QR code backed up: Screenshot or save the QR code and activation details so you can reinstall if needed.
Label your lines clearly: Use labels like “Home SIM” and “RORO eSIM” to avoid confusion when choosing which line to use for data or calls.