Traveling to Japan in 2025? Whether you’re landing in Tokyo, exploring Kyoto, or heading to Hokkaido, having a fast, reliable mobile data connection from the moment you arrive can make all the difference. With RORO eSIM, you can install your Japanese data plan ahead of time and be online within minutes of landing—no physical SIM swap, no airport queue. Here’s how to do it step-by-step.
Step 1: Pre-Departure Preparation
Before you board your flight:
Check device compatibility: Make sure your smartphone supports eSIM and is unlocked. Most recent iPhones and Androids do.
Choose your RORO Japan plan at roroesim.com/en/japan-travel-esim
where you’ll find both fixed data (1 GB, 3 GB, 5 GB, etc.) and unlimited-data options (valid for 2 to 30 days)
Purchase the plan online: After checkout you’ll receive a QR code or activation details in your account dashboard.
Save the QR code and installation instructions offline (screenshot or email) so you’re ready even if airport WiFi is slow.
Step 2: Installing on Your iPhone
Here’s how to install the RORO Japan eSIM in just a few minutes:
Go to Settings → Mobile Data (Cellular).
Tap Add Data Plan (or Add eSIM).
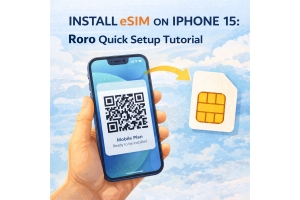
Scan the QR code you got from RORO. On iOS 17+ the camera detects the code directly and prompts you to install.
(If QR fails) Choose Enter Details Manually and type in the SM-DP+ address and activation code from RORO.
After the profile installs, rename it (e.g., “RORO Japan eSIM”) for clarity.
Important: Leave the eSIM inactive until you land in Japan—this preserves your validity period. RORO states the validity starts when you first connect.
Step 3: Activating in Japan
On arrival:
Turn on your phone and connect to a local mobile network; your RORO eSIM should register automatically via the KDDI (or other major carrier) partner.
Enable Data Roaming for this new eSIM.
Go to Settings → Mobile Data → Default Data Line, and select your RORO eSIM for data traffic.
Keep your original SIM for calls/texts if needed, making the RORO eSIM data-only.
Once connected, test by opening a web page or using Google Maps.
Step 4: Tips & Troubleshooting
To make the process smooth:
If you don’t get signal, toggle Airplane Mode ON then OFF, or reboot the phone.
Make sure your phone’s network selection is set to Automatic, so it finds the best Japanese carrier.
Invoice data usage: RORO’s unlimited Japan plans are “unlimited” in name, but come with a fair-use cap of ~3 GB/day high speed then throttling.
Hotspot: Fixed-data plans allow full sharing; unlimited plans allow up to ~500 MB/day hotspot. Check the specific plan details.
Monitor usage via your phone or RORO’s dashboard so you don’t exceed your plan unintentionally.
Why Choose RORO eSIM for Your Japan Trip?
RORO offers transparent pricing and instant delivery of QR code, meaning you’re online right after landing.
Wide destination support: RORO covers Japan via trusted local operator partners and 3G/4G/5G networks.
Dual SIM convenience: Keep your home SIM for voice/text and use RORO for fast local data.
Reusable & top-up friendly: You can top up or reuse the profile on future trips.
Installing a Japan eSIM via RORO is fast, efficient, and travel-friendly. From purchase to being online in minutes on touchdown, you’ll avoid SIM cards, roaming charges, and airport queues. Just ensure your device is compatible, activate after landing, and monitor data usage. You’ll be all set to enjoy Japan—whether sightseeing in Tokyo, navigating Kyoto temples, or relaxing by Mt. Fuji—with seamless connectivity from the start.


