Installing an eSIM is one of the most convenient ways to stay connected while travelling or switching data plans. With RORO eSIM, the process is designed to be quick, digital and smooth — no physical SIM card needed. Below is a step-by-step guide for three device types: iPhone (iOS), Samsung (Android), and iPad, so you’re ready to go.
Before diving into installation, make sure you have everything set up:
Confirm your device is eSIM-compatible: RORO’s installation guide asks you to check the compatible list on their site.
Ensure you have WiFi connection available during installation — it often requires downloading the eSIM profile.
Purchase your RORO eSIM plan online, receive the QR code or activation details in your “My SIMs” dashboard.
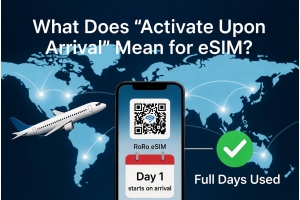
It’s recommended to install the eSIM before you travel, and activate it once you arrive at the destination so you don’t waste validity time.
Installing on iPhone (iOS)
On your iPhone, open Settings → Mobile Data (or Cellular).
Tap Add Data Plan (or Add eSIM).
Scan the RORO QR code you received. iOS 17.4 or newer supports “Quick Install”: point your camera at the QR, the “Mobile Plan” prompt appears, tap Allow.
Alternatively, choose Enter Details Manually if QR scan fails, and input the SM-DP+ address and activation code from RORO.
After the eSIM profile is added, rename the plan (e.g., “RORO eSIM”) so you can distinguish it from your main SIM.
Important: Until you arrive at your destination (or network region), keep data roaming off for the eSIM to avoid starting the validity prematurely. Then, when you land, turn on the eSIM and enable data roaming under Settings.
Installing on Samsung / Android
On your Samsung (or similar Android) device: Settings → Network & Internet (or Connections) → SIM & mobile network → Add eSIM (or a “+ Add eSIM / Mobile plan”).
If your device supports quick install: scan the QR code, allow the device to install the profile. The prompt might say “Add plan to phone”.
If manual install is needed: choose Enter activation details, and fill in the SM-DP+ address / activation code from RORO.
After installation, name the new eSIM profile (e.g., “RORO eSIM UK”).
Again, delay activation until you’re at your destination to maximize plan validity. Once you’re there, turn on the new eSIM line and enable data roaming.
Set the new eSIM line as preferred for Mobile Data, while keeping your physical SIM active for calls/texts if desired.
The process on iPad is almost identical to iPhone: Settings → Mobile Data → Add Data Plan, then scan or manually enter QR/activation code from RORO.
Once installed, go to Settings → Mobile Data → Data Plan, and enable the RORO eSIM line for data. If you use GPS, streaming, or hotspot tethering on the iPad, make sure roaming is enabled.
If you also carry a phone, you can keep the iPad’s eSIM data line separate from your phone calls/SMS line for flexibility.
If your device doesn’t detect the QR code: switch to manual install, or ensure your camera settings allow scanning codes.
After installation but before turning on data: go to Settings → Mobile Data → Default Data Line (iPhone) or Mobile Network → Preferred Data SIM (Android) and select the RORO eSIM.
Enable Data Roaming for the RORO line once at your destination; disable roaming on your original line to avoid roaming charges.
If you face no service: toggle airplane mode, restart the device, or check that Network selection → Automatic is enabled.
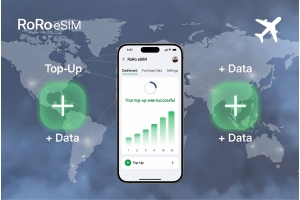
Monitor data usage in RORO’s dashboard or your device settings to avoid unexpected usage.
Installing an eSIM from RORO eSIM on iPhone, Samsung, or iPad is fast, streamlined, and travel-friendly. You do the purchase and profile setup before you depart, and upon arrival, you activate and go. With RORO’s global partner network and seamless plan options, it’s a smart move for your next trip or data-plan switch.